

Finding the best WordPress SEO plugin for your website may sound daunting at first.
SEO is a crucial factor to consider when it comes to the visibility and positioning of your website(s) on Google.
Most folks like to play it safe and just go with Yoast SEO, which is not a mistake at all. But at the same time, there are valuable alternatives to consider, one of which happens to be SmartCrawl.


In a nutshell, this nifty little plugin comes with a ton of convenient features, among others, optimization and formatting your titles, descriptions and meta tags, boosting your PageRank in Google, as well as keyword optimization, XML sitemaps and the like. Here’s everything you’ll ever need to know to make the most of it.
What Does This WordPress SEO Plugin Offer To Begin With?
The number one reason for seriously considering SmartCrawl as a plugin for your website is the sheer simplicity and functionality it brings to the table. It simply makes sure that you don’t need to wonder if your SEO is properly optimized anymore, and it also means no more making guesses and juggling different settings.

You’ve got a one-click setup option, as well as real-time keyword and content analysis, reports and scans, improved social sharing and automatic sitemaps. Simply put, SmartCrawl was designed by the brainiacs at WPMU DEV to allow you to create targeted, bold and clear content that drives up your ranking from Safari and Firefox to Bing and, of course, Google.
This WordPress SEO plugin can be integrated with Moz SEO tools and allows for quick setup of import and export. At the same time, you’ll be able to make use of 301 Redirect to redirect traffic from one URL to another, as well as SEO Crawl – which basically tells Google it’s time to re-crawl your site the second you add new content on there. The Content Analysis is an SEO checker that helps you optimize your content by scanning posts and pages for both SEO and readability improvements, whereas the Sitemap Generator enables you to select what post taxonomies, archives, and types you want to exclude, include or add.
Perhaps one of the most useful tools SmartCrawl comes with is called Social. It includes Pinterest, Twitter card, and Open Graph verification and credits you each time someone shares your posts. Titles & Meta is there to help customize the way your meta descriptions and meta tag titles display on search pages, and SEO Checkup & Reports makes it easy to run diagnostics and receive effective recommendations on how to improve your on-page SEO.
What’s The Real Secret To Using SmartCrawl To Drive More Traffic?
As the old saying goes, the devil is in the details. So, it is necessary to dig deeper into the inner workings of this remarkable WordPress SEO plugin to better understand how to set it up properly in order to ensure it delivers ten times out of ten. Follow the below to the letter, but seek to understand the plugin rather than just copy the steps, and you’ll see the traffic to your website or network grow steadily and surely.
Setting Things Up
The best way to go about installing the plugin is to check out the SmartCrawl Pro page. This is where you can download the free version, explore the many features of the plugin, but also install SmartCrawl Pro directly to any connected site – provided you are already a WPMU DEV member.
Simply click on the SEO Tab for your chosen domain and hit the “Install Smart Crawl” button in order to get this show on the road. Following the plugin’s installation on your website, go to “Run New Scan.” This button will result in a new tab being opened, requiring you to log in to your website and then activate whatever options you want to have in the module named “Quick Setup.”
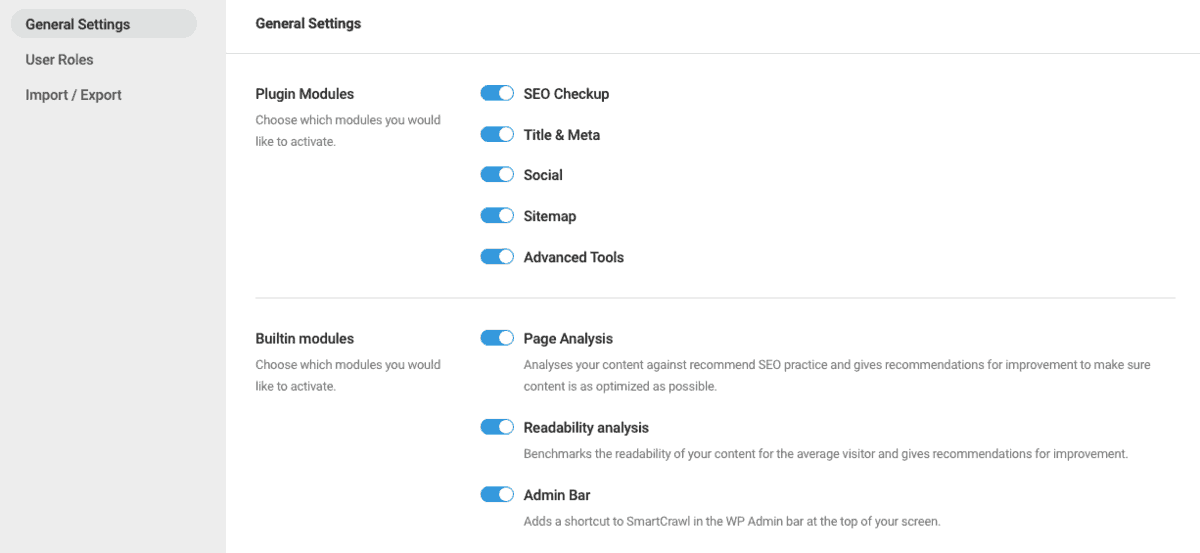

You’ll notice straight away that by default all of the options are set to “ON”, so take your time and browse through all of them, then simply turn off the ones you don’t want. It goes without saying that all of these can be switched back on or off at any later time by going to Settings/General Settings. Once you’re finished going through the features that you prefer, hit the “Get Started” button located at the very bottom of the module.
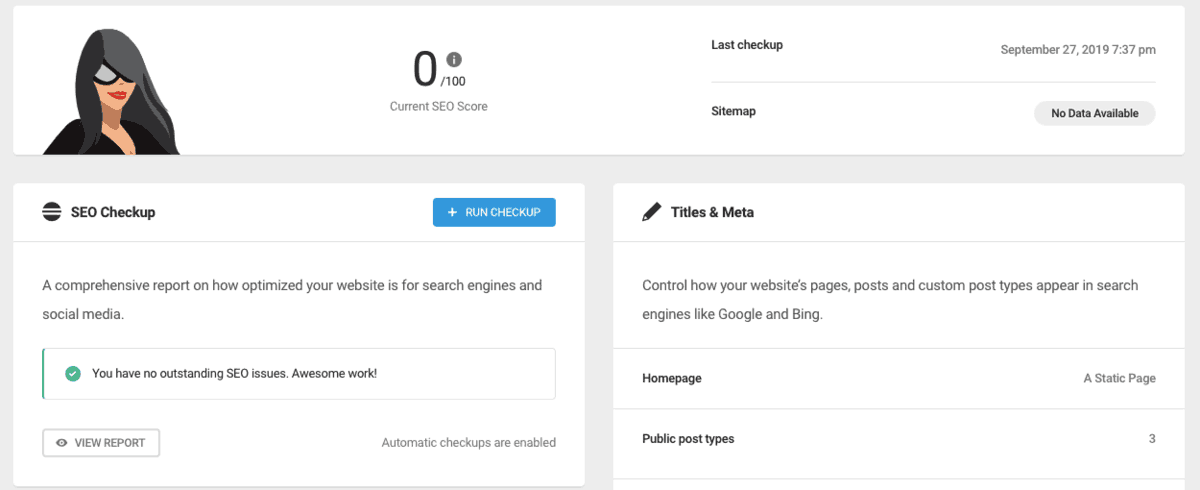
Doing this will not only activate your chosen features, but it will also give you access to your SmartCrawl Dashboard and commence your first scan (which will fall under the “SEO CHECKUP” module). Following the finished scan, you’re able to pause before moving on the next step and examine the scan report (click on “View Report” or by simply heading over to “SmartCrawl/SEO Checkup”).

The Inner Workings Of The SEO Checkup
In this section you’ll be able to examine the full report following the scan, which is particularly beneficial as you’re able to fix or adjust anything found problematic in the report at this point, making your site more SEO friendly. It goes without saying that you can always choose to hit the “Run Checkup” button at the top right end of your screen again if you want to be safe and run another scan.

When observing the results of the scan/report in this WordPress SEO plugin, you can expand the “Checkup outstanding SEO issues” to get real-time suggestions on how best to improve your SEO; you do this by clicking the down arrow located on the right side of each result. In order to help you better understand what each result does and means for your website overall, here is a breakdown of each one:
Canonical
The canonical tag/rel=canonical or simply the canonical URL is basically what search engines refer to whenever they detect multiple versions of the same page around the web or on your site. Nowadays, it is used to solve some pretty complicated issues related to duplicate content. What you need to remember is that this is sometimes and much better and more effective tool to use than a 301 redirect.
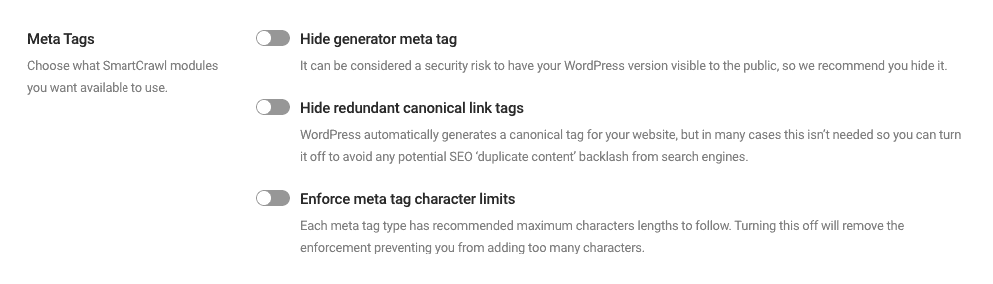
On the other hand, simply go to Settings/General Settings/Meta tags if you want to hide Redundant Canonical Link Tags. If you want to learn more about the purpose of canonical URLs, we wholeheartedly recommend you to check out Google’s simple, yet very effective explanation on the matter.
Favicons
The simplest way to explain what favicons are is to describe them as the small icons that show up in the URL navigation bar; whenever you bookmark a page you want to visit later, the favicons are saved along with the title. Their main purpose is to make navigating your site easier and generally help brand your site.
Generator
If you’ve ever wondered where the version of your WordPress installation gets displayed, it’s in the generator. It is strongly recommended you hide this because having your WordPress version made visible to the public can often be considered a serious security risk. Getting this done with no hassle at all is best done in the Meta Tags module (access it easily by going to Settings/General Settings).

H1 Headings
Clarifying the overall message of your page to search engines is best done with HTML tags most commonly known as H1 headings. Typically the title of a post or page, the H1 tags are the single most important headings on your page by far. Logically speaking, using H1 to H6 tags throughout your posts or pages shows how different blocks of your content stand in relation to one another and how they are connected.
At the same time, this is the reason why headings are typically configured to become consecutively smaller as the numbers get higher (another benefit of using this WordPress SEO plugin). In other words, search engines are designed to use the content of your headings to understand the topic of your writing. On the plus side, headings not only improve readability for both browser bots and your site visitors, but they also make your content more visually appealing. That is why Google and other search engines will reward you if and when you provide a logical and easily scannable structure.
HTTPS
Receiving and sending data over the internet is best done with HTTPS, which is a secure protocol specifically designed for that purpose.
If your site happens to collect any sensitive customer information (think, for example, credit card information), you’d be wise to use HTTPS protocol as a safety measure.
Still, switching to HTTPS will still help you in improving overall security and privacy, even if your website doesn’t collect personal data. For reference, Google currently uses HTTPS to help in setting Page Rank.
Image ALTs
In case an image cannot be displayed on your site due to the fact that the internet connection is slow or the image itself can’t be found, an alt image text is used instead. Put simply: alt image text serves the purpose of helping both search engines and users better understand the subject of an image. The image SEO is a very important topic to stay informed on.
Meta Robots
If you’ve ever wondered how exactly search engine crawlers and bots know what they are and aren’t allowed to crawl on your website, it’s done with the use of the robots meta tag. The way you can prevent search engines from scanning for links on a page or indexing content when using this WordPress SEO plugin is to go to Meta/HomePage/Indexing.


Meta Description
Often displayed in the search results, a meta description is basically an HTML tag that search engines use to identify your page topic. The best way to help search engines determine not only page relevance and rank, but also whether visitors will click on your page or not is to have a clear and friendly description.
Microdata
Microdata is basically a specification for machine-readable data to be embedded into the existing content of HTML documents. It not only provides more relevant results to users but also allows search engines to understand the information found on web pages. Provided that you don’t have any on your site currently even though you’re using this WordPress SEO plugin, adding microdata is sure to enable search engines to present more relevant results to potential visitors from your website.
Title And Meta
The Home Page section is where you’ll be able to set up exactly how Google Search will display your title and meta. It’s very important to take the time to configure these settings because search engines read the title and description for each element of your site. You’re able to see exactly how your site will be displayed in the search results at the top of this section, and as you modify each setting the display will change accordingly. Keep in mind that, while this is all related to your HomePage, you’re also able to modify settings for each page separately (under Page analysis).

The Page Title section of this WordPress SEO plugin is a section where you can enter specifically and precisely what you want search engines to show on results pages to the letter. At the same time, this is what your site will be identified by in the results. You can either type in your desired description or simply insert one of the available macros if you click on the “Insert Dynamic macro” button. Page Description is arguably THE crucial setting here due to the fact that it is the most likely to be indexed by search engines. Similarly, you can also type in a custom description or use a macro.
Options
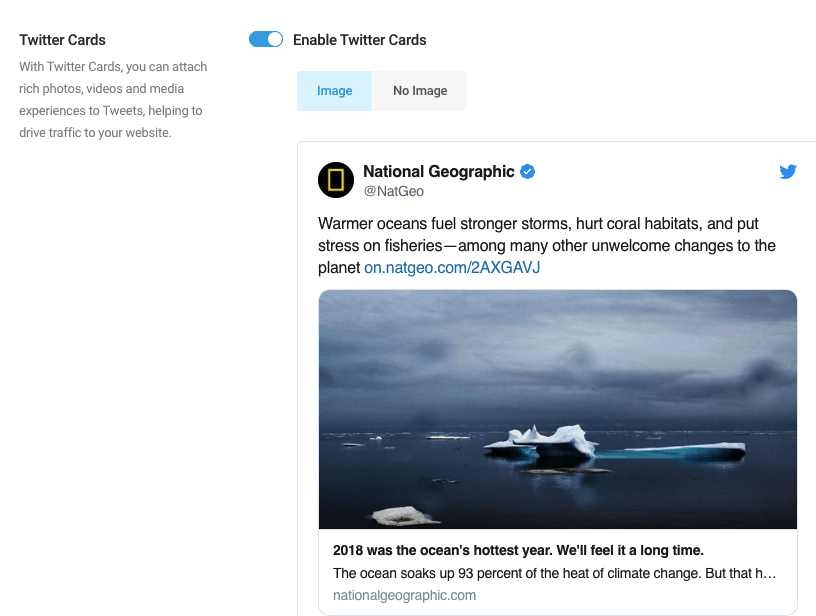
When you’re making a post on Facebook and linking your page (Home Page), you can use OpenGraph in order to enhance the way your site is to be presented. On the other hands, if we’re talking about Twitter, enhancing your site’s presentation during the linking process is something you can do by using Twitter cards.
Indexing
You can use indexing in this WordPress SEO plugin to opt for whether or not your site will appear in search results. For example, Index tags allows you to prevent indexing any duplicate content present on your website – this is pretty important as duplicate content greatly affects your website ratings.
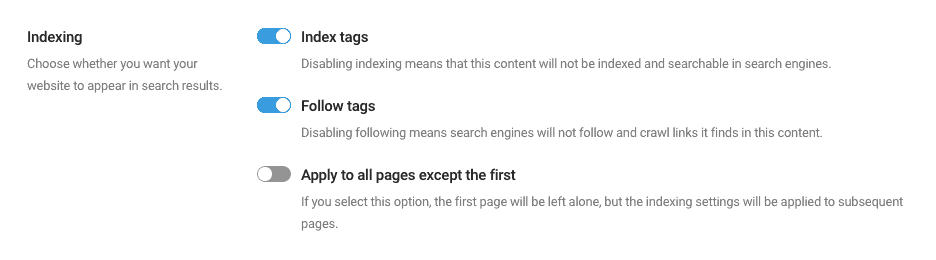

Then, you have Follow tags, to stop crawlers from following dynamic URLs that lead to similar/same content on your site (which is pretty useful if you don’t feel like sharing your link juice to external URLs). Lastly, Apply to All Pages Except the First is a nifty feature to use which lets your first page not have Nofollow/Noindex tags, but ensures they’re added to all other pages.
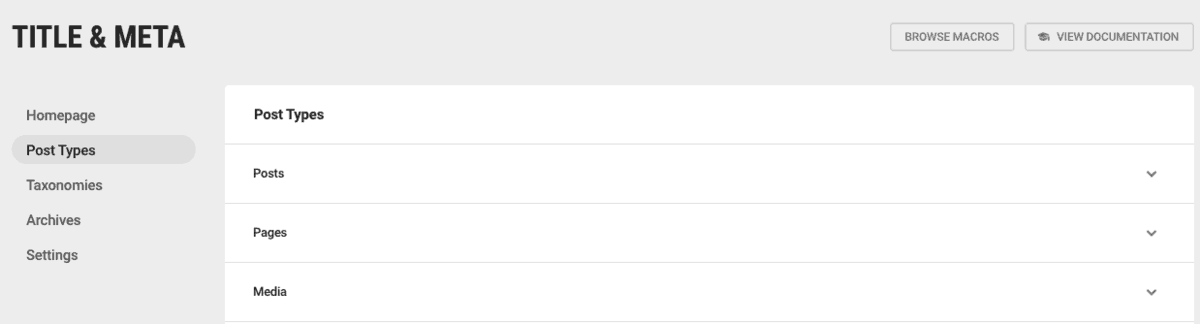
Post Types
This is where you can go through the different options to set up the appearance of the search results for your Media, Pages, and Posts. Similarly, the Taxonomies section is a module you can use to set up the appearance of the search results for your Tags and Categories. Lastly, setting up the appearance of the search results for your archives is easily done in the Archives section. Due to the fact that it follows the same principles and rules, you can simply refer to the Home Page section in order to get more info on each of these.
Social
The convenient thing about fiddling around in the Social module (Accounts section, to be more precise), is that here you’re able to not only inform search engines whether you’re a person or an organization but to also add all of your social profiles, thereby letting search engines know which social profiles specifically to attribute your content on the web. Similarly, the OpenGraph section is where you can play around with completely enabling/disabling OpenGraph for your entire website, and the Twitter Cards section lets you control exactly what your content will look like once shared on Twitter.

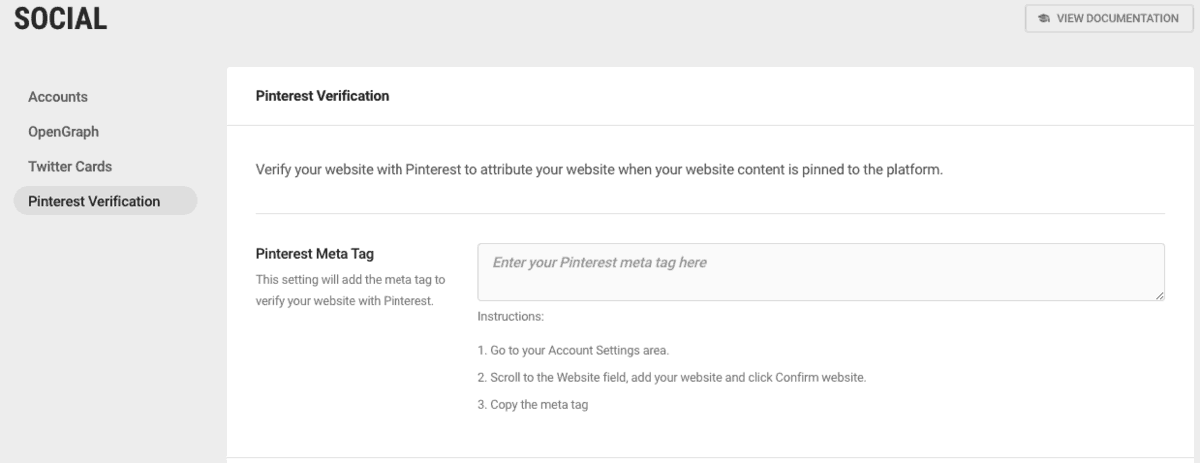
A particularly cool addition to this WordPress SEO plugin is Pinterest verification, which literally lets you verify your website with Pinterest in order to attribute it once your content is pinned. In order to do this, simply follow the steps: go to https://www.pinterest.com/settings#claimWebsite, type in the URL of your website into the designated area, and hit “Claim website.” Once the pop-up window opens up, go to “Add HTML tag”, copy the displayed tag, and paste it into the designated field on your site in Social/Pinterest verification. After the verification, go to the Pinterest tab, hit “Next” and then “Submit.”

Sitemap
The Sitemap section of the module allows you to observe any issues, as well as the basic information that the WordPress SEO plugin found in the process of the Sitemap scan. Here you’re also able to simply view your sitemap if you click on the link, run a new crawl, or turn the automated sitemap feature completely off.
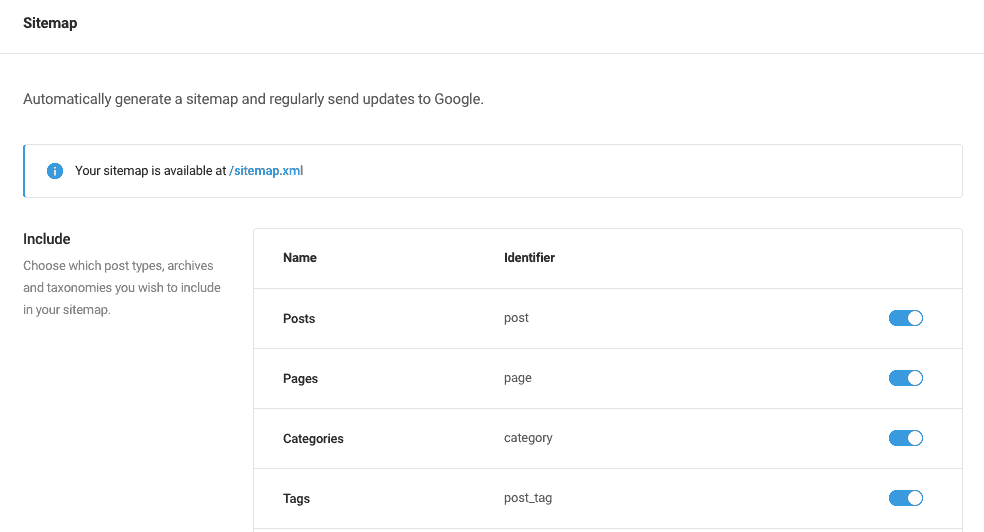

Continuing below, you’re able to set up exactly what you’d like your sitemap to include, or even manually enter additional URLs that are not located in your sitemap. Everything is turned on by default so simply select the features you want to keep and shut off the ones you don’t.
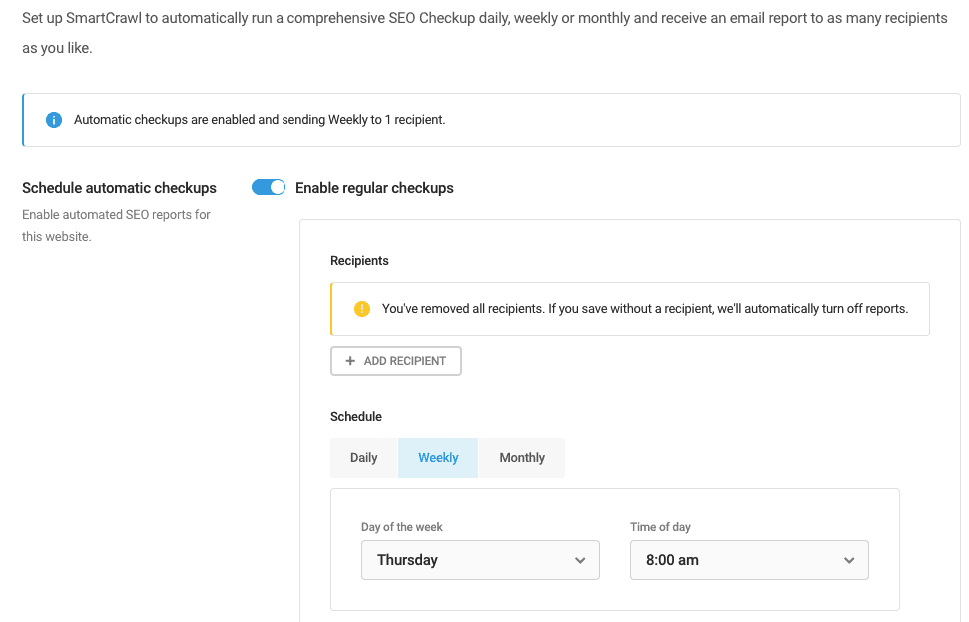
The URL Crawler is designed to scour your sitemap and detect URLs that aren’t present there, as well as any other issues. The important thing to remember here is that, while you’re able to ignore any of the warnings, it’s always a good idea to fix any issues that are found here because this will ensure you are not penalized by search engines. Similarly, you’re also able to set up scheduled automatic URL crawls and corresponding reports.
Advanced Tools
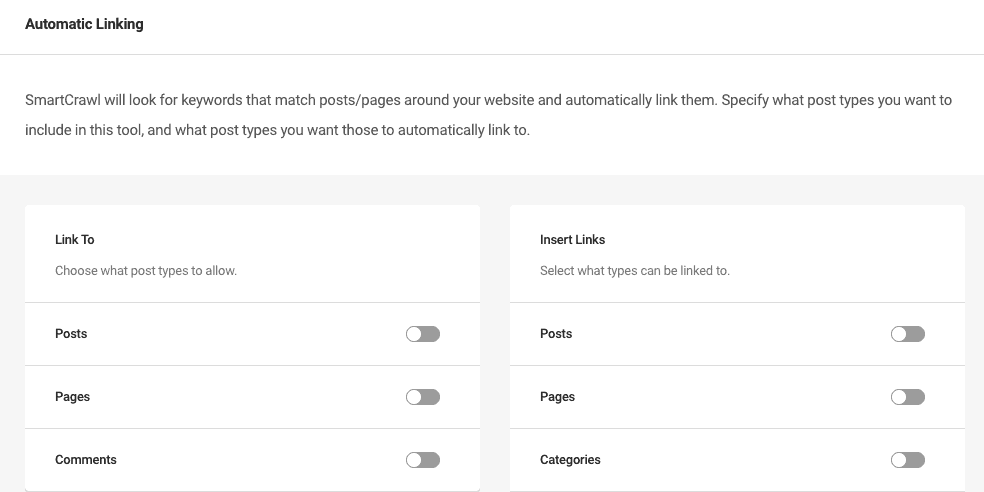
The Automatic Linking section of this WordPress SEO plugin, for example, is convenient in that it enables you to set specific keywords always to be linked to content either on your site or a completely different one. Enabling the module gets you to access to the first setting called Insert Links, which lets you choose which post types the plugin will automatically insert links in, whereas the second setting (Link To) tells the WordPress SEO plugin what taxonomies and post types it should search for and link to.

Then you can really play around with the specifics by using, for example, the Custom Keywords section that lets you link specific phrases or keywords to specific URLs automatically. Similarly, the Exclusions setting lets you specify any keywords that SmartCrawl should not use for links.
Furthermore, you can also make use of URL Redirection and basically forward one URL to another, letting you preserve your search engine rankings for a particular page. Lastly, you can also integrate with the Moz API. Needless to say that Moz is the industry leader when it comes to SEO reports and configuring this integration is completely optional. But all you really need to do here is to enter your API Secret Key and Access ID in the corresponding fields and voila – you’ll be privy to taking advantage of all of their advanced reporting tools. As a result, you’ll be on the receiving end of useful and targeted information that you’ll be able to incorporate into your SEO strategy to ensure your rankings go up and time spent tweaking your site goes down — all courtesy of the stunningly effective WordPress SEO plugin that is that SmartCrawl Pro.
Overall
SmartCrawl Pro has proven to have enough features to help you with your SEO, to ensure that Google gives you the proper ranking your website deserves. Through this nifty plugin, you will be able to not only locate your pain points in no time, but you will also get the needed help with improving SEO aspects of your site you didn’t even know needed improvement.
If you want to get more traffic to your site, and ultimately, sell more, this is the right plugin to add to your arsenal. With little to no effort, you can get the most out of the best SEO practices for your site available out there.