
If you are the owner of an online store, you probably want to make sure that everything runs smoothly – from making orders until their delivery. A crucial and unavoidable part of this process is shipping.
In this article we are bringing you an incredible #plugin that will help you to charge #WooCommerce #shipping by #item.
There are numerous patterns and methods for configuring your shipping methods, but many of them are not available or supported by the basic WooCommerce system. As a result, you can easily add some useful and easily accessible plugins to your online store.
One of such plugins that we recommend is WooCommerce Table Rate Shipping PRO. This article will show you how to set up shipping by item with this particular plugin step by step.
What Features Does Table Rate Shipping PRO Offer?
This plugin has many useful features that can help you adjust shipping methods easily according to your own needs and wishes.
For example, you can set up unique shipping method names and calculate shipping based on country, state, postcode, etc. You can also import or export your preferred shipping methods and edit them in a spreadsheet. The plugin can also hide shipping methods or stop them from using them.
How to Set Up Shipping by Item Count?
“Shipping by item count” has become a viral shipping method in the online environment because it charges shipping according to the number of items in the cart that are from the same class. If you would like to install this feature in your store, follow our guidelines, and you will have no problem with that.
1. Add a New Product
To start with, you should add a new product using this plugin and specify its price regularly. It is really user-friendly, just click on the left navigation pane, click “Products,” and then “Add new.” Choose the name of your product and type its price.
2. Set Up the Shipping Zone and the Shipping Method
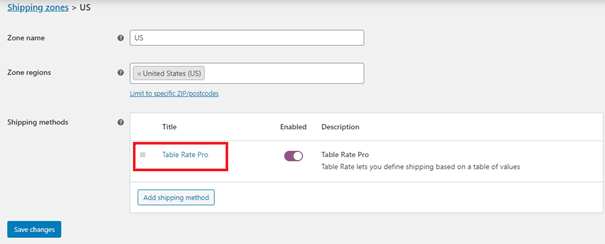
The next thing to do is choose your shipping zone or, in other words, a geographic region in which you want to apply specific shipping charges or rules. When you open the Shipping tab, you should click “Add shipping zone.” There you can type the name of the zone and select the regions.
After you’ve added the shipping zone, you’ll need to select a shipping method for that zone. Choose “Table Rate Pro” and make it your default shipping method.
3. Add a New Shipping Method
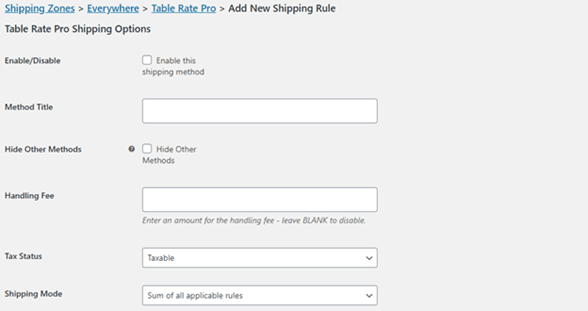
You should add a new shipping method to your store now that you’ve added Table Rate Pro. You can do so by clicking “Table Rate Pro” or by pointing your cursor to it and selecting “Edit.” Then you should click on “Add new” and select the option “Enable this shipping method.”
Now it is time to pick a name for this shipping method in “Method Title.” You can choose whatever suits your needs and offers best. For example, “Standard Shipping,” “Express Shipping,” or “Local Pickup.”
After you’ve chosen the correct name, you can specify whether your shipping should be taxable or non-taxable in the “Tax Status” drop-down menu. If necessary, you can also set a handling fee.
4. Add New Rate
The following step includes setting up rules for the shipping. There are plenty of options here, and you can choose the pattern you like the most.
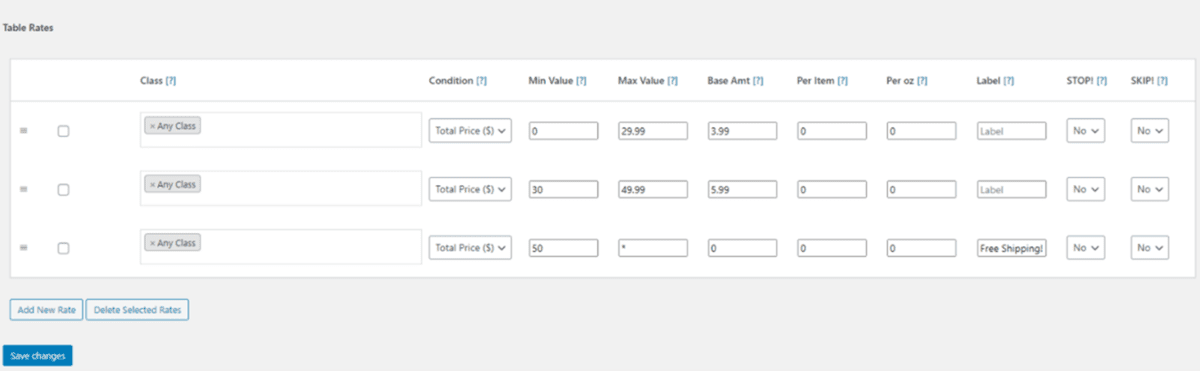
Firstly, you can specify whether you want to apply those rules based on the shipping class. If you don’t, you can leave it at “No Class Set,” and the rules will apply to all products that aren’t in a specific class.
Secondly, you can choose the condition under which this should be applied. Here you should click on “Item Count.” This way, the plugin will set up the shipping based on the number of items in the cart.
Furthermore, you can choose a minimum and maximum value and, this way, set up the number of items in the cart to which you want to apply this.
Then you can tell the plugin how much you want to charge for shipping and how much you want to charge per item. The base amount will be automatically added to each order, but the number of items ordered will determine the final total. After you’ve completed all of this, you should save your changes.
5. Check the Result
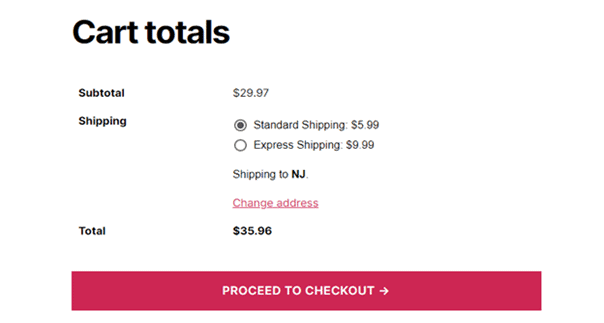
Now it is time to see the result of your effort. Click on “WooCommerce Plugins by JEM products” in the top-left corner of the screen and then click on “Visit Store.” Your product will appear in the store. Select the product and add it to your shopping cart.
You’ll see the fixed shipping price you’ve specified, plus shipping per item. Try to increase the number of items and click on “Update Cart” to check if everything works as it should. This way, you will verify that shipping is calculated correctly and offer your customers a great shopping experience.
As you may notice, this is just one of the great and fully adjustable features included in Woo Commerce Table Rate Shipping, but there are even more of them to be explored.
You need to have a vision, and our plugin will make it happen. Suppose you want a better experience running a WooCommerce. In that case, you should also try our other plugin WooCommerce Order Export PRO, which could help you export the data and save you a lot of time with automated reports. You can find it on.
Conclusion
Owning an eCommerce store does not have to be complex and demanding if you use proper plugins that can assist you daily and make all of the work seem like a piece of cake.
Invesing in a high-quality plugin will bring your online shop to the next level and make it stand out!
JEM Products were designed to make your visions and wishes come true, even if those wishes have something to do with the shipping charge