
Nowadays it’s easy to find a plugin for WordPress that will change your regular site into an eCommerce one. With so much online shopping being done, and retailers closing physical stores left and right, it’s no surprise to find out more and more software developers are jumping on the webshop wagon.
Many eCommerce plugins are too complicated, over-developed with various features, most of which you’ll rarely or never use. That makes mastering such a plugin is complicated, cumbersome, and takes a lot of time.
Selling #digital goods seems too complicated? Read this article to learn how the #Forminator plugin makes it a walk in the park!
Big businesses that offer a wide variety of products and/or services surely do benefit from an abundance of features, but they do have whole teams dedicated to creating and operating their web-shop. So what about the sites that are run by just one person, or a small group of a few people?

Sites like these tend to have just one product in a number of variations in their inventory. A perfect example would be a home business that prints T-shirts. They certainly shouldn’t need to jump through endless hoops just to set up a simple order form for their one product.
While sifting through all the solutions available for eCommerce sites we’ve come to the conclusion that on one end you have something like Easy Digital Downloads, that while comprehensive, could be complicated and intimidating. And on the other end, you have Forminator, which isn’t as robust, but is ostensibly easier to use and implement, making it perfect for “one product sites”.
If we got you interested in Forminator by saying just that, then read on to find out more about it.
Forms Aplenty
You’re probably wondering how a form plugin would be a good solution for your eCommerce site. However, if you think about it, what is a web-shop, but a bunch of forms linked together. The registration form, product form, order form, payment form – break them all down and a form plugin starts to seem more and more like a viable solution using which you can build your eCommerce business.
Just as its name suggests, with Forminator, you’ll get access to a number of various forms, both premade and those you can build from scratch.
Outside of conventional forms, you’ll also be able to create polls, quizzes, calculation, and payment forms.
The latter is the most important because everybody needs to get paid, but the former ones are required to get to the final step.
As we’ve mentioned earlier, the main selling point of Forminator is the pure simplicity of its use. From the drag and drop editor to the premade fields and elements, everything is designed to get things done quickly and to go live the moment you’re done.
Order Forms
We’ll start with the lifeblood of any shop, online or physical– orders.
With Forminator an order form can be completed in as little as 5 minutes if you’re using the premade templates, but it won’t take you much longer even if you decide to build everything up from scratch.
The first thing you’ll need to do is access the dashboard. This will be your go-to place, where all your projects start and where you’ll always get to see your entire database.
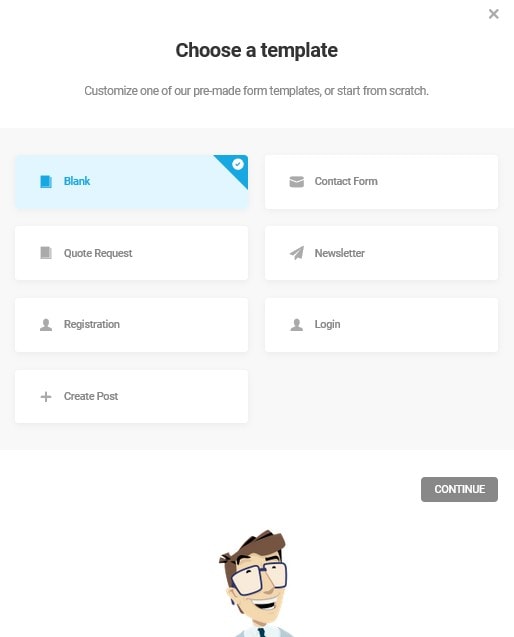
From here you’ll be able to create a new form.
Every new form you create will consist of several premade fields that you can edit, or remove outright. These fields include the user’s name, phone number, and email address, which are very common in most forms and are things we’ve all seen hundreds, if not thousands, of times before.
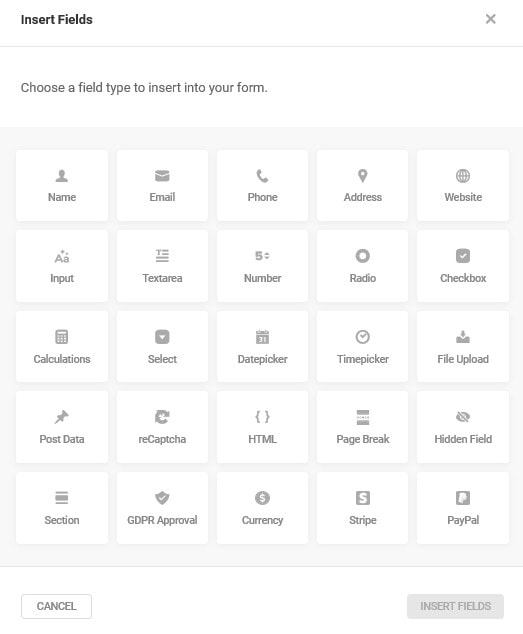
It’s up to you to choose each field that will go into the final form and to arrange them in the order you wish they be displayed.
Everything’s done in real-time through the aforementioned drag and drop editor which is indented for things such as positioning as well as adding pop-ups and new fields.
After you’ve set up all your fields, now it’s time to customize each one individually. To do so, there will be a variety of settings that impact the field in their own way.
Probably the most important one is the setting which determines if a field is required or optional. Again, this should be familiar to all users, since we’ve all been on the frontend of these kinds of forms.
Advanced users will also be able to customize the field further using CSS classes and rules that hide or show the field.

All the fields you’ll use generally work in the same pattern, however, there are the payment fields that require a little more attention.
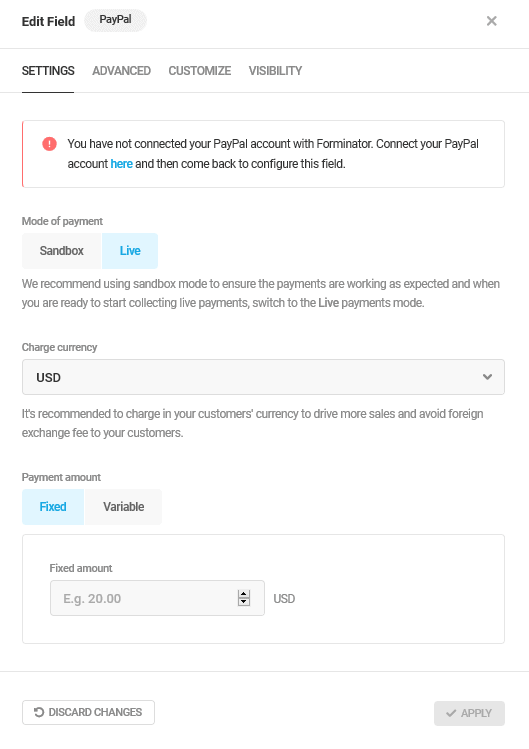
First, we need to point out that with Forminator you’ll get to use PayPal and Stripe as payment options, but only one can be used in a single field.
Naturally, to use them you’ll need to connect your account to these services and Forminator. Once that’s done, you’re good to go.
The process of adding these fields is the same as any other, the only differences lie in the additional settings which you’ll need to define in order for everything to work properly.
Of course, you’ll need to select the currency and the amount for your payment field. The payment amount doesn’t have to be fixed. The plugin also allows you to have a variable amount in your payment fields; this can be easily taken from a Calculation field. Since most of other plugins allow this in their premium versions, you will love the fact that Forminator gets you this completely free! Since this is an important part of the whole process, there is an added feature that lets you test the functionality in sandbox mode, before you go live (this has to be changed to live manually to enable payments).
Also, an interesting feature is the ability to disable the use of particular credit cards. Note that there is only the option to disable them and not the option to choose which ones get offered since PayPal presents the card options automatically.
As you might have guessed, if not changed the form will fit in with your current theme, but you can alter the appearance of anything that is displayed to make it stand out if you want.
The final step in creating your order form is to update the label of a submit button (if needed). The plugin will then automatically insert the button at the bottom that will put everything in motion.
Once you have done that, your form will be saved and added to the database where you can access it from the dashboard at any time.
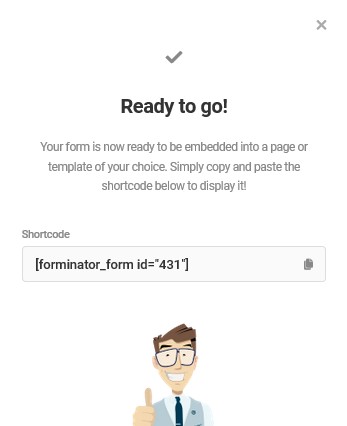
For inserting the form, you’ll be given a shortcode that you can then add to your posts and/or pages simply by pasting it there. If you are a Gutenberg user, you’ll be happy to see a Gutenberg block that lets you insert Forms, Polls, and Quizzes.
Making a product page could, therefore, consist of just creating a new page with an image and description of the product and then a copy of the shortcode. No hassle with product types, inventory numbers, connected products, etc. – it really is that easy.
Before you paste the shortcode into a page, you should definitely take advantage of the preview option to immediately see if there is something you’ve missed or something that needs to be changed.
Doing this right away will eliminate the need to come back to the form once it’s already been added to a page or maybe even published (even though any changes done afterward will apply).
Although your form will work right away with the default parameters that you don’t have to change, you do have the option to go through the behavior settings and email notification settings to customize the whole process further both for yourself and the customer. Here’s an example of what your order form may look like.
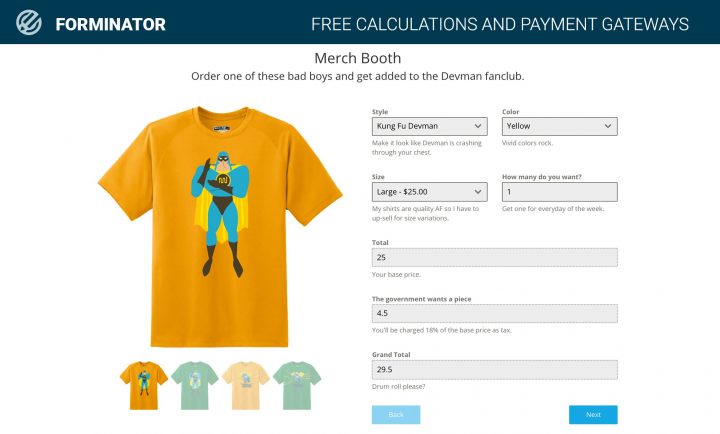
Here you’ll get to customize things such as the messages which are sent out after orders are done, inline validations, loaders showing, etc..Basically, these are things you can adjust to better fit your preferences, but most of the time you’ll be just fine sticking with the default settings.
Everything you need to know in order to create forms has been covered, and believe it or not it really does consist of just these couple of easy steps.
There are however additional features that Forminator provides you with that can enhance your business, or to be more specific, adjust it to better fit your customers.
What we are referring to are the polls and quizzes you can create, either for fun, or to help you better understand your customers.
Email Notifications
When someone completes an order form, you obviously want to receive a notification. Where other services provide a notification system only in their paid plans, Forminators gives you one for free.
The Email Notifications support Email Routing, which means the recipient of an email can be conditionally changed based on user input on the form.
Maybe you have different teams in your company i.e., Sales, Marketing, Development, etc. and you have a feedback form where users can select the department they want to contact using a Radio field. The admin emails can be routed conditionally to the respective department based on users’ choices while submitting the form. Awesome, right?
Integrations
If you wanted to connect 3rd apps such as Zapier, Slack, Trello, Google Sheets, and plenty of other ones to Forminator, you’ll be happy to know that all the integrations are already there!
All you have to do is to connect a desired application to the plugin, and you’ll be a click away from sharing data between Forminator and those third-party apps.
Since the plugin is free & open to millions of WordPress users, the developers among you will love the fact that it is possible to use the developer API and the included hooks & filters to build your own integrations or custom apps.
Polls
Polls are a great way to feel out what your customers want and are probably the easiest way to conduct market research.
When you are creating polls with Forminator you’ll just be continuing the work you already started with forms and expanding it. Even the user interface is very similar to the one you’ve probably gotten used to by now.
Polls usually have a cut and dry approach, where the focus is put on a question and the possible answers to said question. If you’ve ever done something as rudimentary as a Facebook poll, you’ll understand this process without any fuss.
As we’ve said, the first step is to formulate your main question and add an optional description and/or image if either is needed.
With that part out of the way, you’re immediately onto the answers section. You can add as many answers as you want using which your customers will vote.
The final part, just like with the forms, is to create and name the button that puts the process into motion. After that, you’re done.
For all intents and purposes, outside of publishing and copying the shortcode to the desired post/page you won’t have to do a thing more. The default settings and behavior of your polls are set up so that you don’t need to change anything. However, we’ll cover everything just to show how you can tweak it if you want to.
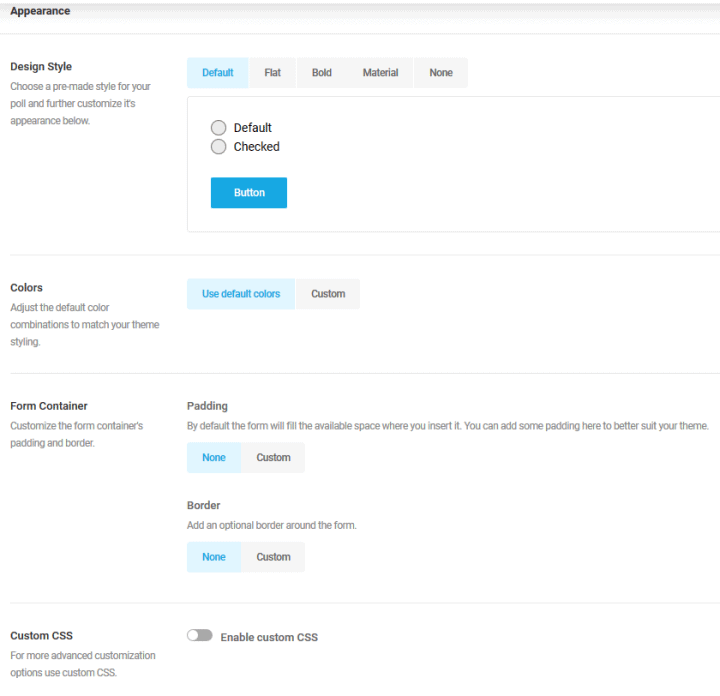
Just like with everything else created with Forminator, you can customize the appearance of your poll, or leave it to be integrated into your theme.
If you do choose to customize then you can expect to have the liberty to change the design style, colors, borders, padding, etc. Essentially all the things you would usually get to change in boxes/blocks/fields of any kind. Also, if you’re up to it, you can incorporate your custom CSS for even more options.
Poll behavior is something worth checking out even if you won’t be changing it because that way you’ll get to know how your poll will work on the frontend for your users.
The first two behavior options are related to the poll results. Namely, you can opt to not show the results at all, show them after the vote has been cast, or show them through a link regardless of voting.
Additionally, you can also display the total number of votes that have been cast.
If the poll is for your research only and users won’t get anything tangible out of it, you should strongly consider keeping the data only for yourself.
Showing the results after voting is done ensures that no one will be swayed by the votes already cast. Similarly, showing the number of votes rarely means anything to the average user, but if it’s shown while only a handful of votes have been cast it might deter potential voters to share their opinion.
While you definitely shouldn’t overthink it, there are some nuances worth considering when creating polls. The same can be said for allowing multiple votes per user or limiting them to one – it all depends on the data you’re trying to collect.
Other available options don’t impact the results as much and are centered around the submission method (i.e. if the page needs to be reloaded or not) and rendering for users taking the poll.
Furthermore, you can enable email notifications to be sent to the admins after submissions have been made.
Quizzes
Quizzes won’t give the straightforward information polls do, but can still be a good source of it, nonetheless.
When creating personality or knowledge quizzes, the first step is similar to creating a poll, only instead of a question with an optional description and image you’ll need to insert a title with a required image and the description of your quiz.
After that, questions are added like fields, each with their corresponding set of answers which can have one or more correct ones.

Insert as many questions as you wish, and you’re almost done. All that’s left to do is to customize a few settings.
At this point, it seems unnecessary to repeat ourselves about the appearance options, so let’s just say that everything that’s been available thus far is also available here (color, spacing, padding, CSS, etc.)
Quiz behavior settings share a lot of similarities with those of polls – you’ll get to select between a real-time display method, or on submission. The main difference is in the message that’s displayed for a correct or wrong answer.
The formulas that link to the answers are already in place, so all you need to do is fill out the rest of the messages. The same goes for the social sharing feature using which you can enable your users to post their results on Facebook, Twitter, or LinkedIn. Everything is already in place; all you need to do is formulate a message around the data.
Conclusion
The most important thing to remember about sites that you run yourself is to find the best method that works well but also makes your life easier at the same time.
Meaning you don’t need to use software designed for a much bigger scope which will give you headaches, even if it’s “one of the best on the market”. Instead, choose a simple solution that offers a core group of features you’ll use on a regular basis.
All in all, for a single product site, Forminator could very well be the perfect solution. And if you need more from it, don’t forget to check all the extra features coming in the PRO version.
Good blog you have here.. It’s hard to find high-quality writing like yours nowadays.
I really appreciate people like you! Take
care!!
This is really good information and I love how you presented it. I am looking at using this form for ordering a service I am providing.
The only challenge that I face is a user dashboard where they can be able to log in and see their previous orders or request a new order.
I am yet to figure this out, I know it integrates with 3rd party tools but I don’t know which one can work?